

iSMA I/O Modules Start Up Guide (iSMA MINI and iSMA MIX series IP) + Firmware Upgrade Process iSMA-B-4I4O-H-IP - iSMA-B-8I-IP - iSMA-B-MIX18-IP
Connecting and configuring the device
1) Power supply
You can use 20Vac to 28Vac or 20Vdc to 28Vdc
The power required (in VA when powered with 24Vac and in W when powered with 24Vdc) depends on the device model and can be found on the installation instructions enclosed with the device.
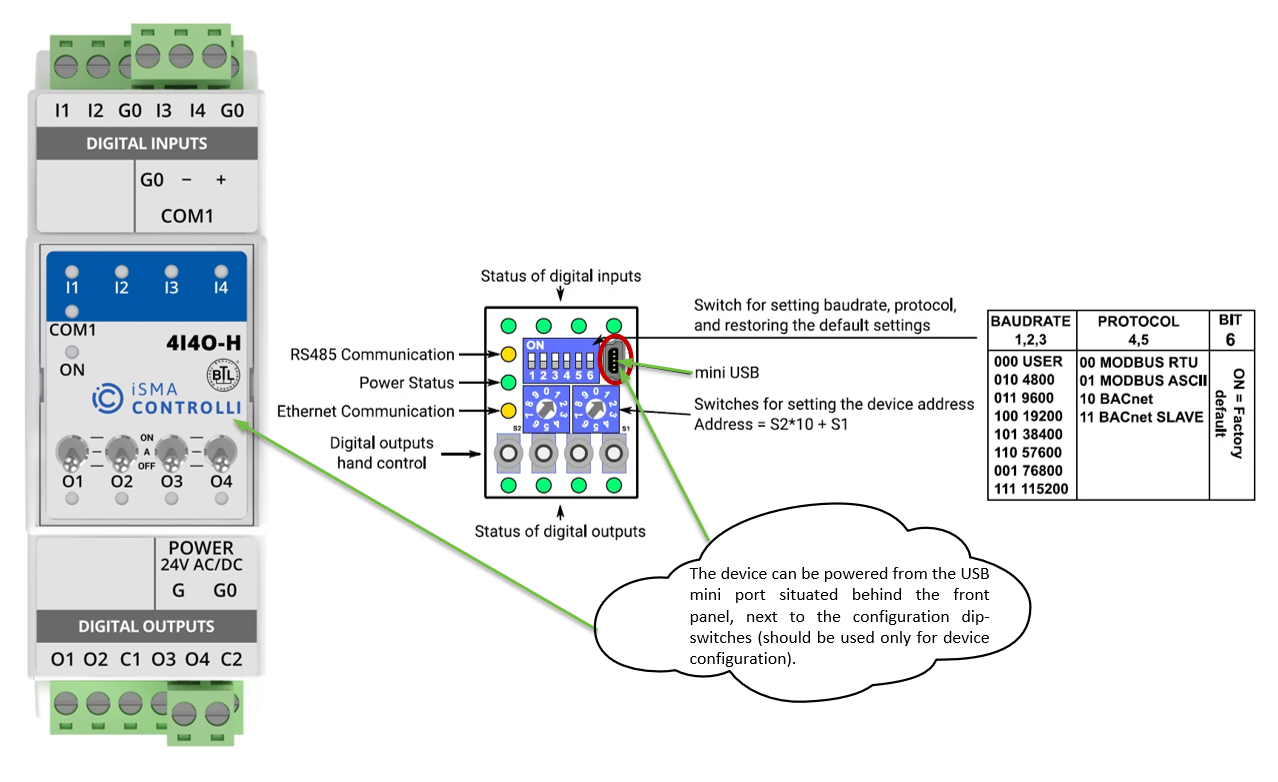
The device can be powered from the USB mini port situated behind the front panel, next to the configuration dip-switches (should be used only for device configuration).
2) IP port
The IP port uses a standard RJ45 connection.
3) Connecting a PC to the device
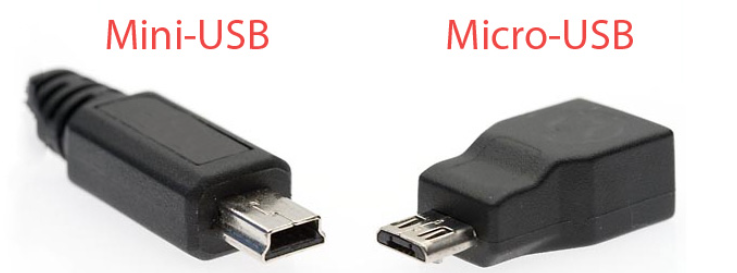
The USB mini port in front of all iSMA MIX and MINI devices allows to connect them to a PC for firmware update and configuration.
The cable required is a USB mini to USB A. The cable needs to be a power and data cable.
The software required on your PC is the iSMA Configurator. You can find the FREE iSMA Configurator software HERE and related documentation online (Link below).
The iSMA Configurator software is designed to perform configuration, firmware updates, and diagnostics of non-programmable iSMA CONTROLLI devices. The software provides communication with USB, BACnet IP, Modbus TCP/IP, BACnet MS/TP, and Modbus RTU. It allows for monitoring the device’s operating parameters, remote changing of I/O module output states and input modes. This simple and intuitive to use, portable software is a convenient tool for every user. The iSMA Configurator is free of charge and can be obtained from a distributor, partner, or downloaded from the iSMA CONTROLLI download center. This software is intended for Windows operation systems only, and can be run on Windows 7, 8, or 10. There is no need to install any additional software or drivers in order to run the iSMA Configurator
4) Verify and update the firmware
This is very important: the first thing to do is to check and update the device firmware!
Detailed instructions on how to do this are available in the iSMA Configurator manual HERE on chapter 3.1
5) You must restore the device default settings
Restoring the defaults after updating the firmware is recommended.
-
Turn off the power supply
-
Set dip-switch number 6 to ON
-
Turn on the power supply; power LED blinks
-
Set now the dip-switch number 6 to OFF to restore the default settings. To cancel the
reset, turn off the power and set the dip-switch number 6 to OFF
6) Setting up the communication protocol
The protocol can be configured using the dip-switches and rotary switches or via the iSMA Configurator software. Note: Setting the dip-switches and rotary switches will take priority over any settings within the software.
7) Setting up the inputs/outputs type
The setup of the type of inputs (sensor, resistor, voltage, etc) and outputs can be done either using Modbus/BACnet configuration points, or simply via the iSMA Configurator software.
If you have a module enabled for IP communication, the setup of the inputs and outputs can be done also through the web interface of the device
8) Web interface configuration
All IP version modules are equipped with a web server, which allows the use of a browser to show the module status and changing the configuration.
To access the web server, open the browser and enter the IP address of the module (default IP address is 192.168.1.123).
Use the following default credentials:
Username: platform
Password: 1000
For any more information on the Web Interface, please consult the device manual at the chapter "Web Configuration - IP version only"
9) RS485 serial port
On iSMA MIX and MINI "IP" devices the RS485 port is used only as a Modbus IP to Modbus RS485 gateway. A Modbus IP Master controller (like a Jace or MAC) will be able to poll a Modbus RS485 slave device connected to the iSMA MIX/MINI using it as a gateway.
The port is disabled if the iSMA MIX/MINI is configured for Bacnet communication.
The iSMA MIX and MINI series are non-optoisolated devices.
Recommended cable from manufacturer is Belden and the cable required will depend on the application and the environmental conditions. You can check the Belden website for the correct (tech sheet) Here.
Like on any RS485 network, correct network terminations will be required. Please follow our advice on the use of bias and termination resistors, a proof of concept network drawing for your application can be provided upon request during the purchase of your equipment.
Additional information
This guide applies to the following products
iSMA MIX series:
iSMA-B-MIX18-IP, iSMA-B-MIX38-IP
iSMA MINI series:
iSMA-B-8I-IP, iSMA-B-8U-IP, iSMA-B-4I4O-H-IP, iSMA-B-4U4O-H-IP, iSMA-B-4U4A-H-IP, iSMA-B-4O-H-IP, iSMA-B-4TO-H-IP
Upgrading The Firmware on iSMA IO’s
-
Lift off the cover of the IO module
-
Start the iSMA Configurator
-
Plug in the USB cable and connect to your PC
-
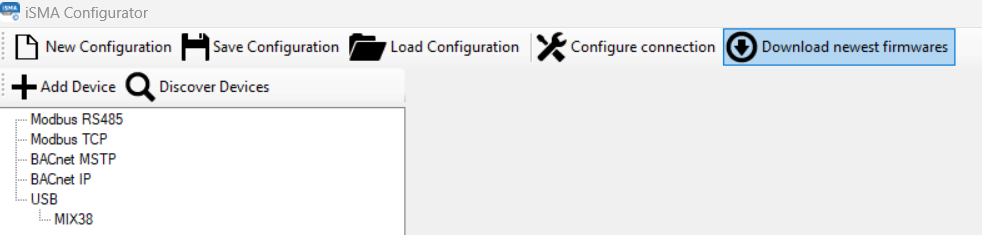
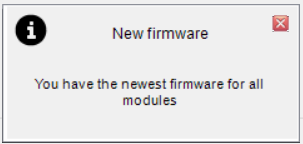
Download the newest Firmware files by clicking on the highlighted menu button.
You should get a pop up message bottom right of the configurator software screen shortly after pressing this button with the message that you have new firmware.
-
Right Click on the IO module you wish to upgrade the firmware and select Upgrade
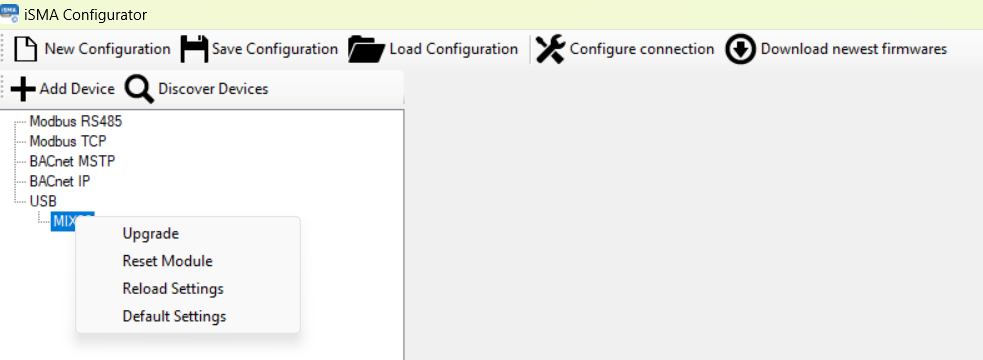
-
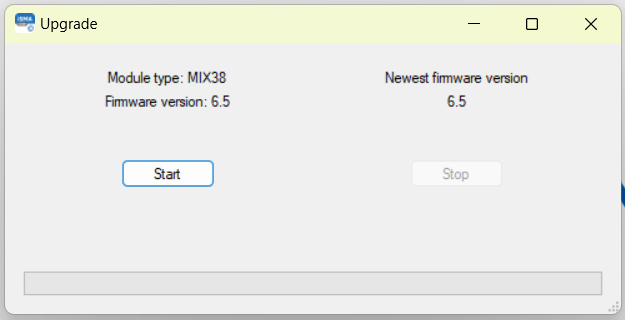
The popup window will display the module type and the current firmware installed and the newest firmware version on the right.
-
If the version of your firmware is lower, click the Start button.
-
The Bootloader bar bottom left of the configurator software screen will load a green loading bar and once complete, you should see the following message pop up bottom right
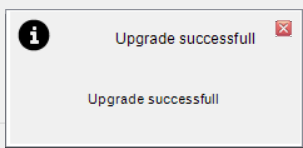
-
Verify the firmware process was successful by following Step 5 again.
-
The popup window will display the module type and the current firmware installed and the newest firmware version on the right. These should now be the same.
-
Unplug the USB cable
-
Replace the plastic cover
Other Resources & Customer Survey:
💬 Don't miss out! Follow the Forest Rock News channel on WhatsApp Click Here!
💬 We’d also love your feedback! Please take a moment to complete our quick Customer Survey
It only takes a minute and helps us serve you better!

IoT Devices for BMS, Automation & Smart Connectivity | Forest Rock