

Connecting and configuring the device
1) Power supply
You can use 20Vac to 28Vac or 20Vdc to 28Vdc
The power required (in VA when powered with 24Vac and in W when powered with 24Vdc) depends on the device model and can be found on the installation instructions enclosed with the device.
The device can be powered from the USB mini port situated behind the front panel, next to the configuration dip-switches (should be used only for the device configuration).

2) RS485 serial port
The iSMA MIX and MINI series are non-optoisolated devices.
Recommended cable from manufacturer is Belden and the cable required will depend on the application and the environmental conditions. You can check the Belden website for the correct (tech sheet) Here.
Like on any RS485 network, correct network terminations will be required. Please follow our advice on the use of bias and termination resistors, a proof of concept network drawing for your application can be provided upon request during the purchase of your equipment.
3) Connecting a PC to the device
The USB mini port in front of all iSMA MIX and MINI devices allows to connect them to a PC for firmware update and configuration.
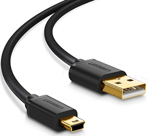
The cable required is a USB mini to USB A. The cable needs to be a power and data cable.
The software required on your PC is the iSMA Configurator. You can find the FREE iSMA Configurator software HERE and related documentation online (Link below).
CAUTION: We had a technical support call FOR-5759 that had communication issues. The Baud rate had been set through the USB tool to a rate that isn’t selectable through the Niagara dropdown menu. Once this was set back to 115,200 using the USB tool and then changed it to that same setting in Niagara the module started communicating.
TOP TIP: Our advice is to stay away from the USB tool if possible as once you set the Baud rate using the dip / rotary switches and/or the USB tool there are two Baud rates - the ‘actual' and the ‘user’ Baud rate, and it’s difficult to see which the module is actually using.
SANITY CHECK: Once you have changed the Baud Rate, as a sanity check, ensure you can communicate with the IO module via a direct connect USB to RS485 comms adapter. My Favourite is a WaveShare Industrial USB to RS485 Converter with Original FT232RL and SP485EEN Embedded Protection Circuits for Industrial Control Equipment and/or Applications with High Communication Requirements, Here is a URL Link to where you can purchase one, USB-RS485 Converter.
4) Verify and update the firmware
This is very important: the first thing to do is to check and update the device firmware!
Detailed instructions on how to do this are available in the iSMA Configurator manual HERE on chapter 3.1
5) You must restore the device default settings
Restoring the defaults after updating the firmware is recommended.
-
Turn off the power supply
-
Set dip-switch number 6 to ON
-
Turn on the power supply; power LED blinks
-
Set now the dip-switch number 6 to OFF to restore the default settings. To cancel the
reset, turn off the power and set the dip-switch number 6 to OFF
6) Setting up the communication protocol
The protocol can be configured using the dip-switches and rotary switches or via the iSMA Configurator software. Note: Setting the dip-switches and rotary switches will take priority over any settings within the software.
7) Setting up the inputs/outputs type
The setup of the type of inputs (sensor, resistor, voltage, etc) and outputs can be done either using Modbus/BACnet configuration points, or simply via the iSMA Configurator software.
If you have a module enabled for IP communication, the setup of the inputs and outputs can be done also through the web interface of the device
Additional information
This guide applies to the following products
iSMA MIX series:
iSMA-B-MIX18, iSMA-B-MIX38
iSMA MINI series:
iSMA-B-8I, iSMA-B-8U, iSMA-B-4I4O-H, iSMA-B-4U4O-H, iSMA-B-4U4A-H, iSMA-B-4O-H, iSMA-B-4TO-H
Other Resources & Customer Survey:
💬 Don't miss out! Follow the Forest Rock News channel on WhatsApp Click Here!
💬 We’d also love your feedback! Please take a moment to complete our quick Customer Survey
It only takes a minute and helps us serve you better!

IoT Devices for BMS, Automation & Smart Connectivity | Forest Rock